“Far off in the red mangroves an alligator has heaved himself onto a hummock of grass and lies there, studying his poems.”
Mary Oliver
One of the most profound things that you observe as you travel across our great nation is just how different the landscape changes. The US holds an astonishing number of different ecosystems and habitats. You can wake up one morning gazing out at waves crashing along the shore, only to find yourself another morning shaded by towering mountain peaks. You may find yourself surrounded by cacti and red dirt or taking in the fiery reds, oranges, and yellows in an autumn deciduous forest.
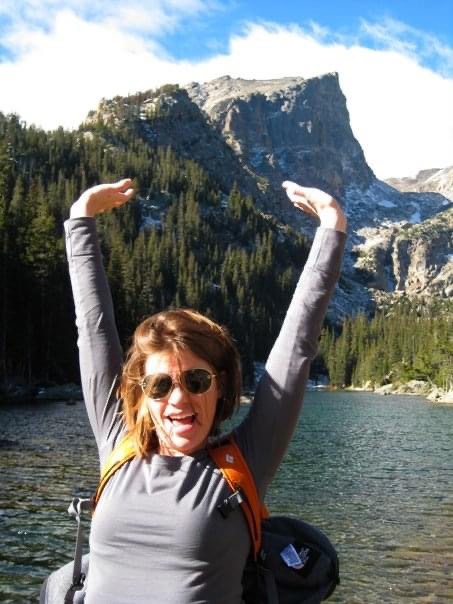
I always knew that the US held amazing sights. I discovered this fact outside of the pages of a book in my early 20s. The first time I visited the Rocky Mountains took my breath away and the term “mountain” earned new respect for me.
My first time in the Rocky Mountains, pre-Dan. I was enraptured with the expanse of them!
What I didn’t do in my 20s… heck, what I didn’t do necessarily in my early 30s… was to not just catch the glimpse. The moments in which I was rewarded with varying landscapes across the US were quick and seemingly unintentional.
Dan and I found an early love for our national parks. We jokingly (I think it was before it became a social media “thing”) said that we should visit them all before we died. It would become our bucket list that we did together.
We’ve already achieved a lot. Together, we’ve visited 29 national parks. And it’s been amazing.
But, I realize now, those mini vacations we took where we stopped in and toured national parks, on many occasions for only a day, were just a glimpse into these majestic lands. This adventure we’re on, where we travel the country and camp on a full time basis, gives us the opportunity to do so much more. And for that, I’m thankful.
Biscayne National Park
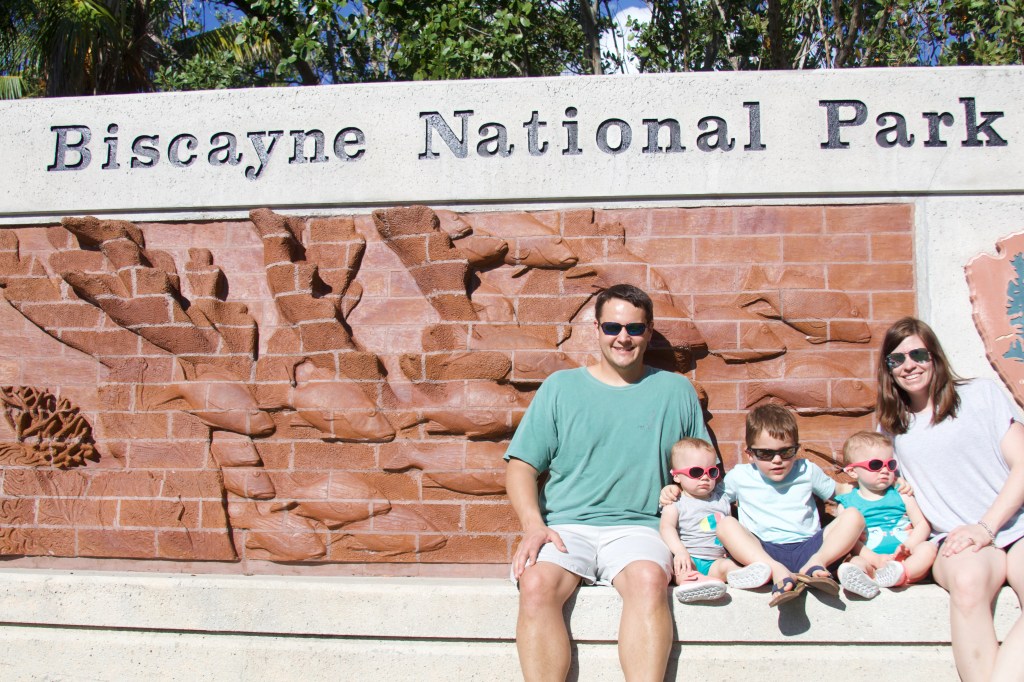
We first visited Biscayne National Park in 2018 when our kids were only 4 and 1.5 years old. We flew down to Florida for my cousin’s wedding and stopped in both Biscayne and the Everglades. Our first visit to the park was a quick stop and literally a stamp in our passport book. We knew that the park held more than what we saw, but without a boat or making reservations for a tour, there wasn’t much more that we could do.
Our first Biscayne Visit in 2018.
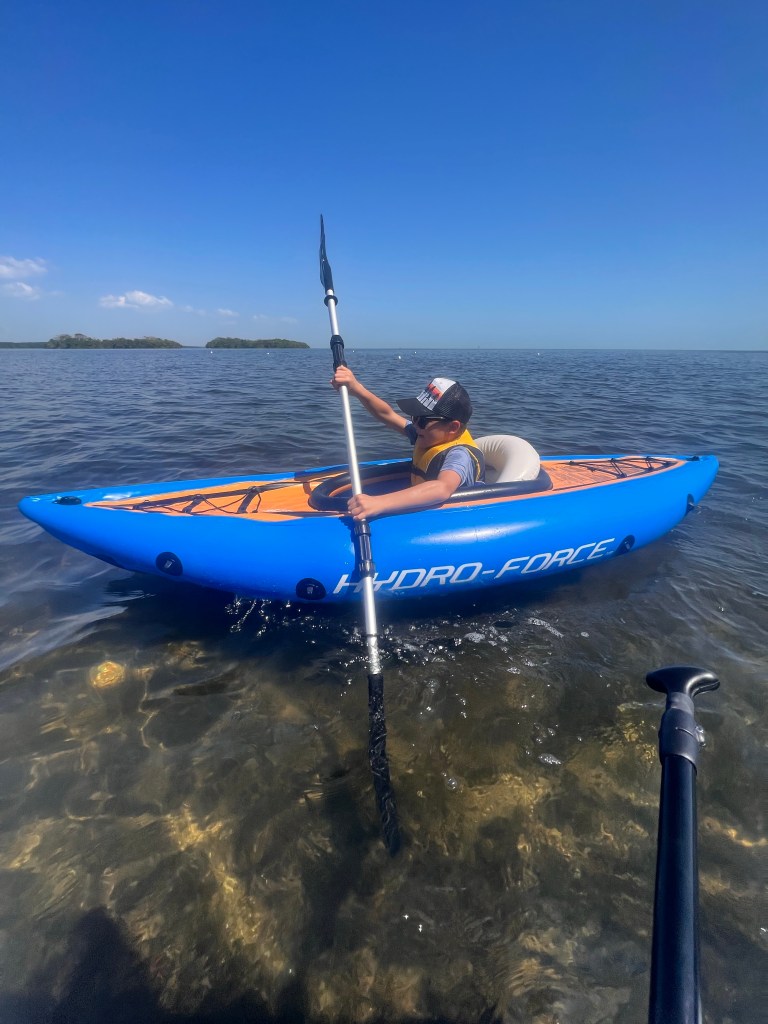
Being down in southern Florida, we knew we wanted to stop at Biscayne so our kids could earn their Junior Ranger badge and we could explore the park a little bit more. We prepared ahead this time, however, and brought our inflatables so we could get out into the bay.
Biscayne National Park is located just off the southeastern coast of Miami. Biscayne was established as a national park in 1980, and it protects mangrove forests, coral reefs, many Florida Keys, and the waters of Biscayne Bay.
The mangrove forests that line the bay play a vital role in sustaining the marine ecosystems by providing a nursery for 70% of the fish species that live there. Birds flock to the tops of trees, and you can spot spoonbills, ibises, herons, and pelicans along the shores.
Bordering Biscayne Bay are various Florida Keys, which provide an additional home to more marine wildlife. Here you can snorkel in lagoons and along coral reefs to see many other types of fish and marine animals.
Exploring Biscayne National Park with Kids – Kayak, Paddleboard, or Canoe
Being that the majority of this national park is a marine ecosystem, the absolute best way to explore the park is on the water. We were able to bring our inflatables with us to explore the park. But no worries if you do not have watercraft that you are traveling with, tours are available to book through the Biscayne National Park Institute. You can find tour prices and descriptions listed here.
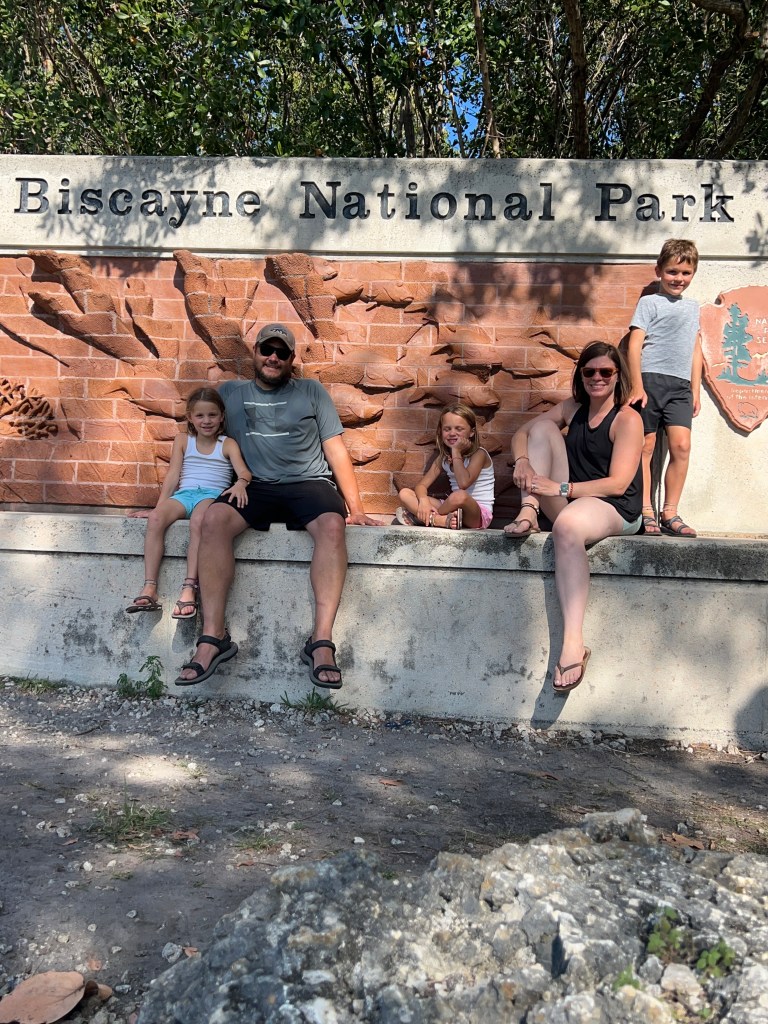
The kids in the same spot, but just a little older.
The first thing you will want to do is visit the Biscayne Visitor Center. The visitor center is located in Homestead, Florida. Here, you can find some exhibits on the ecosystems surrounding the bay, as well as talk to a ranger. We were able to look at maps the ranger showed us and see suggested kayak paddling routes.
After visiting the visitor’s center, you can launch your paddleboards and kayaks at the marked launch in the same parking area. From here, you are free to explore!
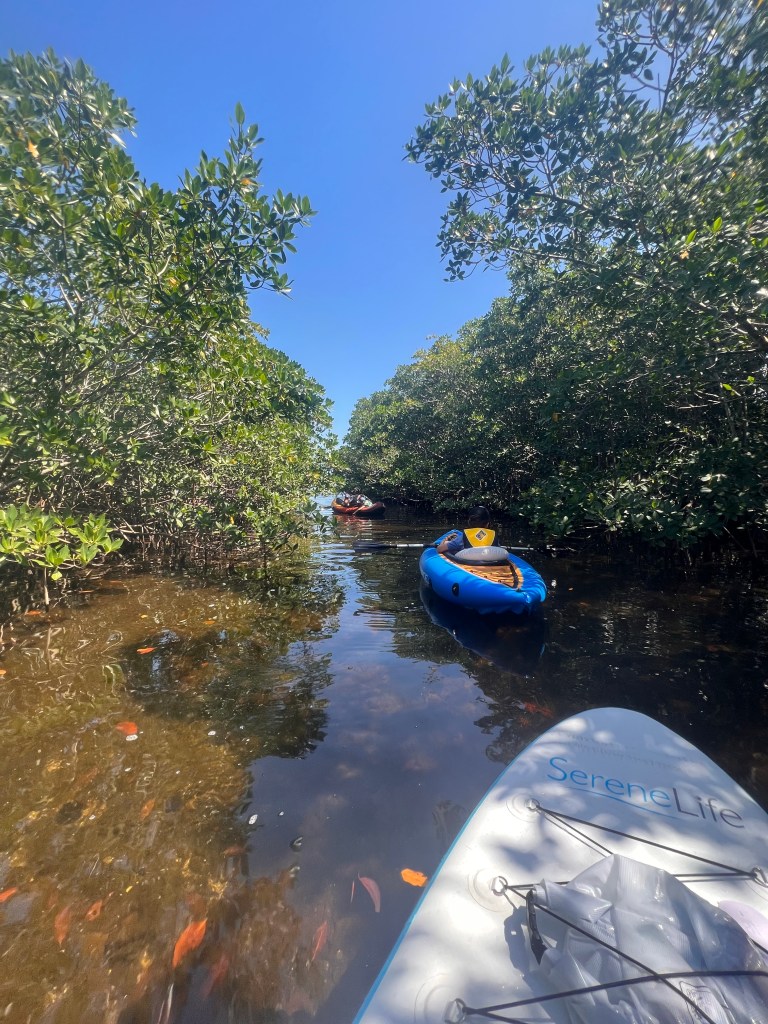
Immediately, you can skirt the shorelines and study the mangroves. Mangrove trees are simply magnificient to look at closely, and it is a marvel how their roots grow in such an interesting way. There are a few sloughs where you can paddle into the mangroves. We honestly had no worries about getting lost. The sloughs were incredibly slow moving and the ranger had told us that no matter how far in we got, they always connect back together and lead to either a canal or the bay.
Levi’s first time in his inflatable kayak.The girls doubled down with Daddy.Paddling into the mangroves.
It was in these mangrove sloughs that we found a huge variety of fish. Schools of mullet darted around our paddles and jumped out of the water in front of us. We saw ibises take off from their roosts in the trees and observed jellyfish floating in the waters beside us.
When you aren’t paddling in the mangroves, paddle around the sea grass flats in Biscayne Bay. Here you can find an abundance of different wildlife. Our favorite that we saw were two barracuda. The waters here are shallow and clear, allowing you to see all the way to the bottom of the bay.
Paddling in the sea grass flats.
The best thing about exploring the park via the water is that you can decide how long you want to stay out. We were out on the water for about two hours before we trekked back across the bay and to the visitor center. Once we arrived at the visitor center, we allowed the kids to jump out in the shallow water and get themselves wet!
One nice part the paddle experience at Biscayne is the accessibility of the water access. The launch area is large and easy to load and unload your watercraft. There is also a freshwater hose near the kayak launch so that you can rinse off your gear from the saltwater. Take a picnic lunch to eat by the water when you are finished!
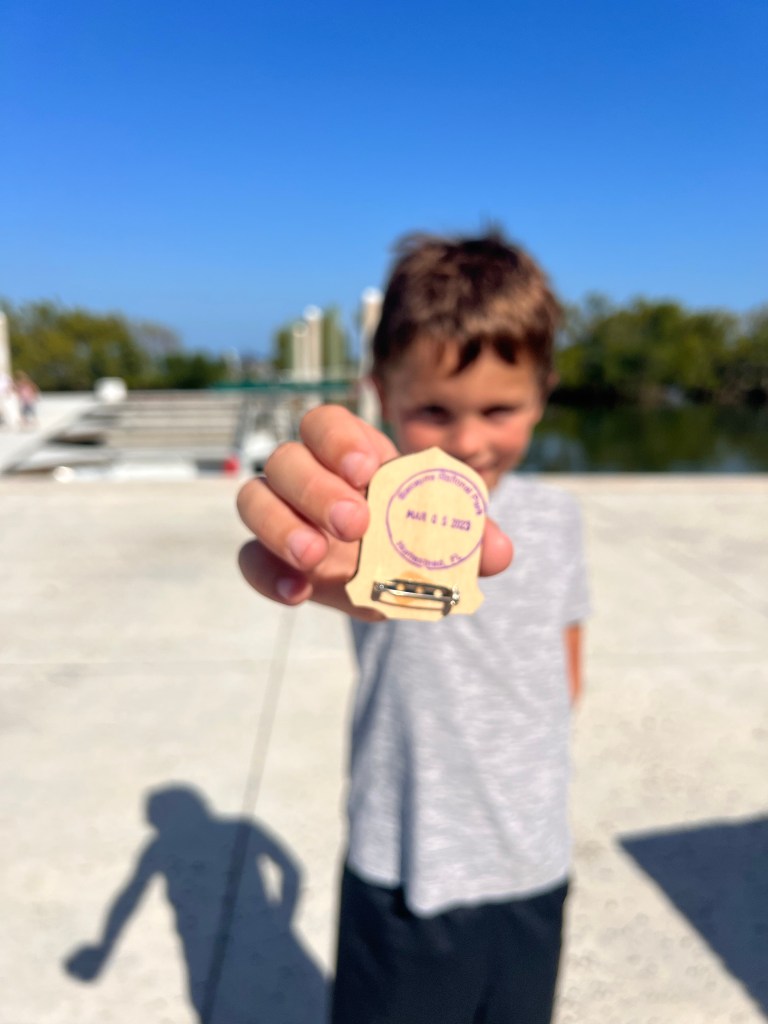
Junior Ranger Badge
Like the other national parks in our national park system, your children can also earn a junior ranger badge while here. The cool thing, however, is that Biscayne Bay has partnered their junior ranger program with nearby Everglades National Park and Big Cypress National Preserve.
Working on the Junior Ranger badge after lunch.
While you can earn an individual badge at Biscayne, the junior ranger book is actually combined for all three. To earn a badge at Biscayne, complete three of the “dolphin” activities in the book. Once those are complete, show your work to a ranger and earn your badge.
The best part? Once you earn badges at all three national parks, you can earn a patch for all three parks. We picked up our booklet at Biscayne and earned the badge there. Then we took our book home and the kids completed the remainder of the activities while at home. When we visited Everglades and Big Cypress the following weekend, we were able to earn our patch!
Another Junior Ranger badge in the books!
More of Biscayne National Park
Quite possibly, the best way to get our and see Biscayne National Park is by getting on the water. If you are an experienced kayaker, or if you are able to book a tour, I have heard from the rangers that accessing the keys bordering Biscayne Bay are simply magical. There are lagoons to go snorkeling and other opportunities to view wildlife on these small islands.
We were unable to access these further islands, but maybe one day we will find ourselves back here. What I am most grateful for after this recent trip was the ability to see the national park from the water. Being able to take the kids out on the water and immerse them in the wildlife and plantlife growing on the shores of southern Florida was amazing.
If you ever find yourself visiting southern Florida, we highly recommend a stop at Biscayne National Park!
“The world reveals itself to those who travel on foot.”
-Werner Herzog
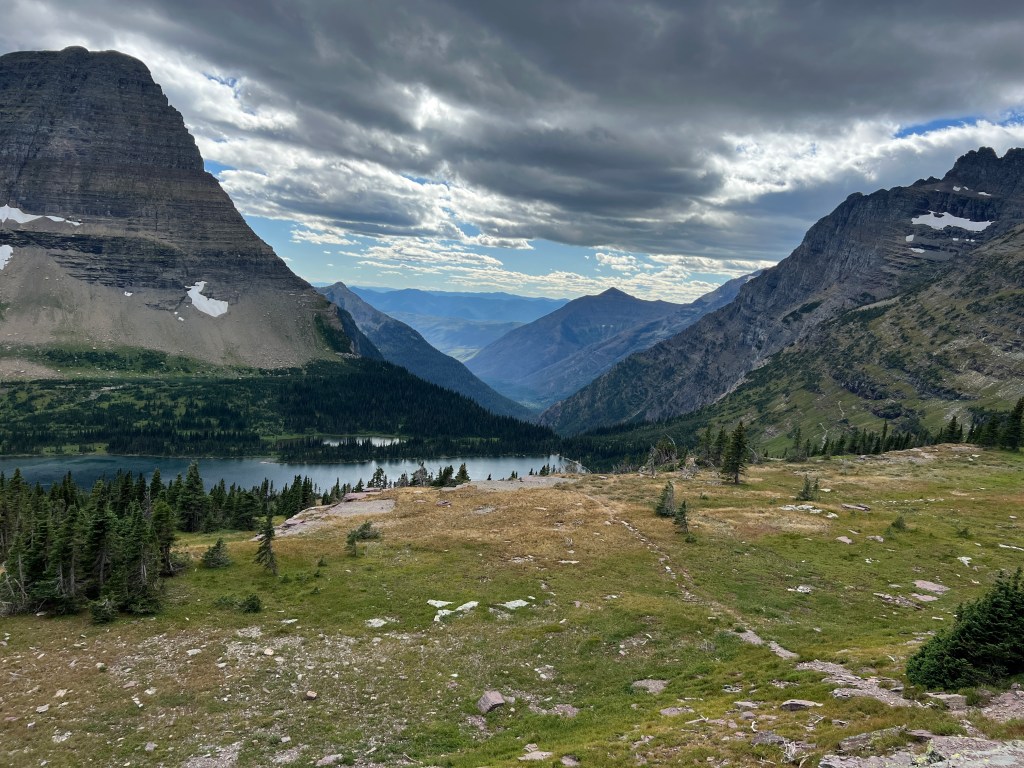
Glacier National Park is nicknamed the “Crown of the Continent” and for good reason. The striking mountain peaks rival those of Europe. Even though they aren’t incredibly high, their formation leaves bowls at the tops of the mountains, giving way for lingering snow packs and glacial deposits. The park boasts over two dozen named glaciers, and while warming climate is reducing the numbers and sizes of these glaciers, the ability to see some of them up close is still worth booking the trip.
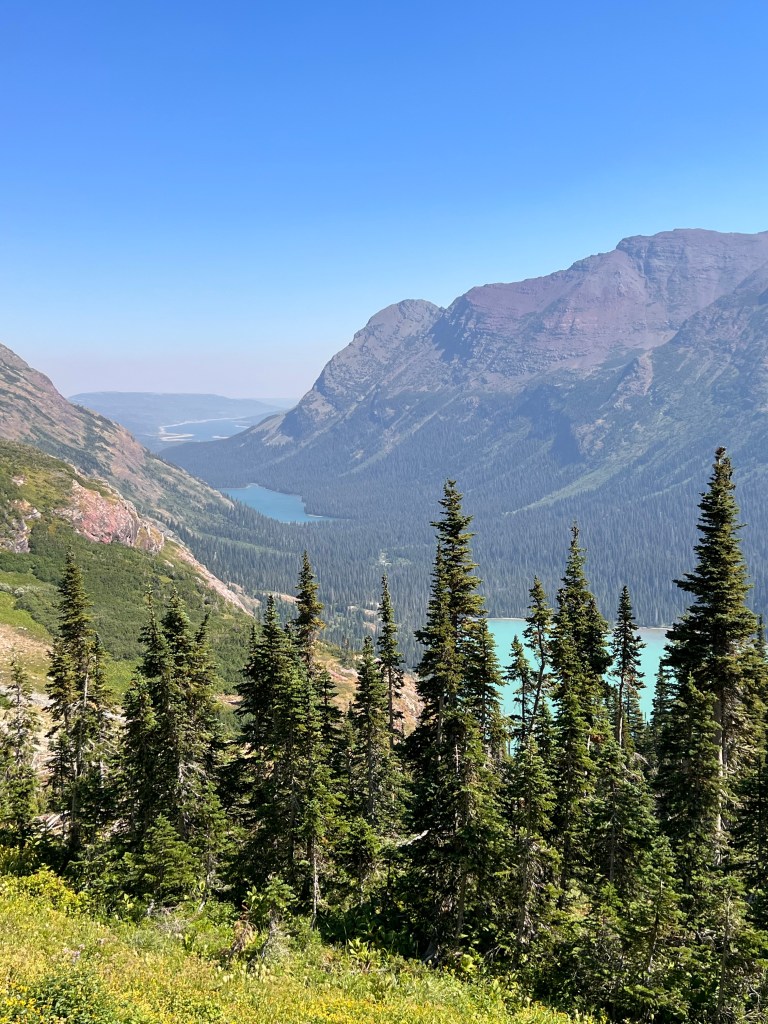
One of the jewels in the crown of Glacier is the nearly 50 mile Going-to-the-Sun Road which connects the towns of West Glacier and St Mary. The road is an engineering marvel, completed in the early 1930s and riding along the Continental Divide. It’s highest point is at Logan Pass, sitting at over 6,600 feet of elevation. Going-to-the-Sun Road gives visitors sweeping views of the valleys below, with waterfalls and high elevation snow packs visible around every turn.
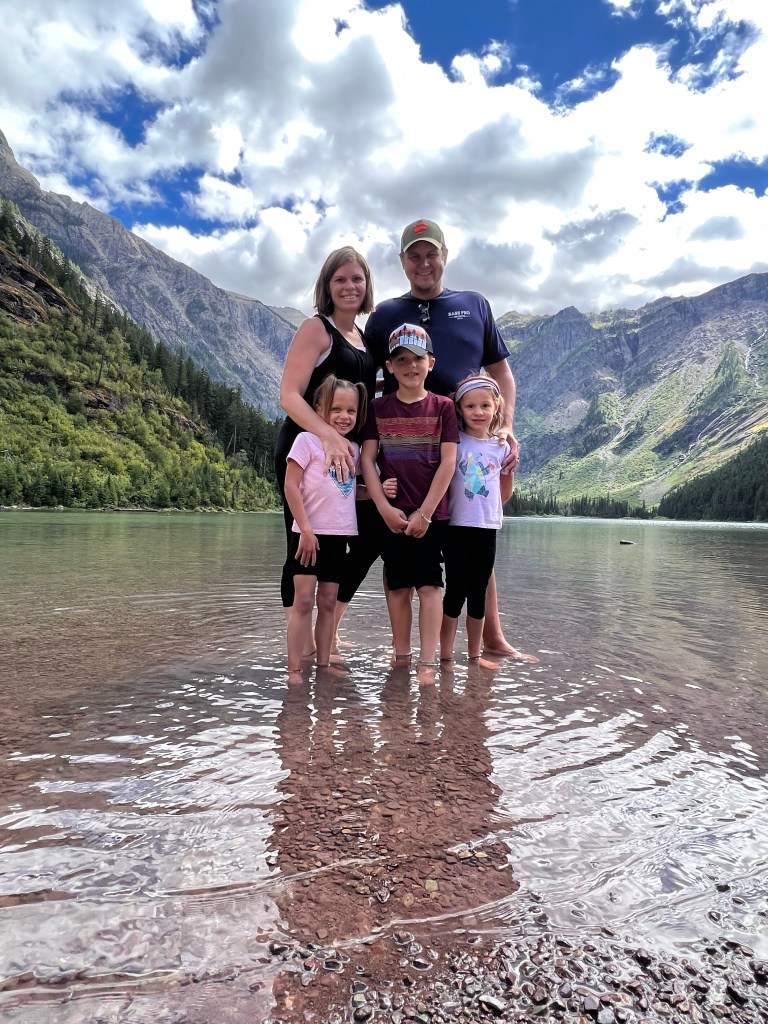
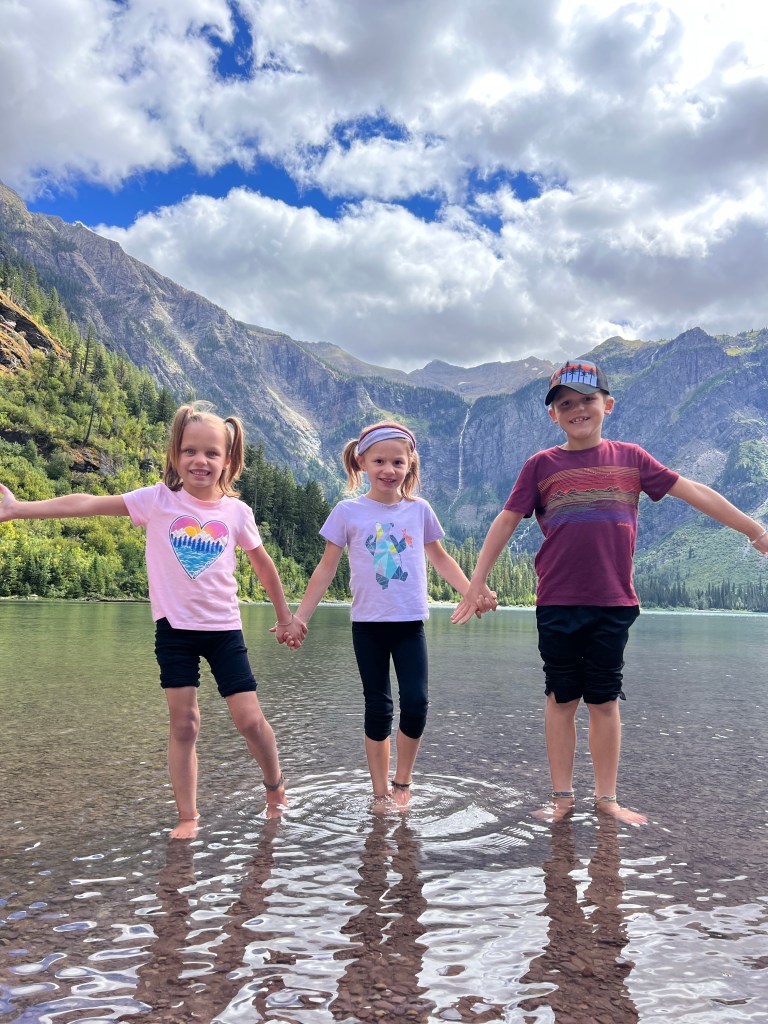
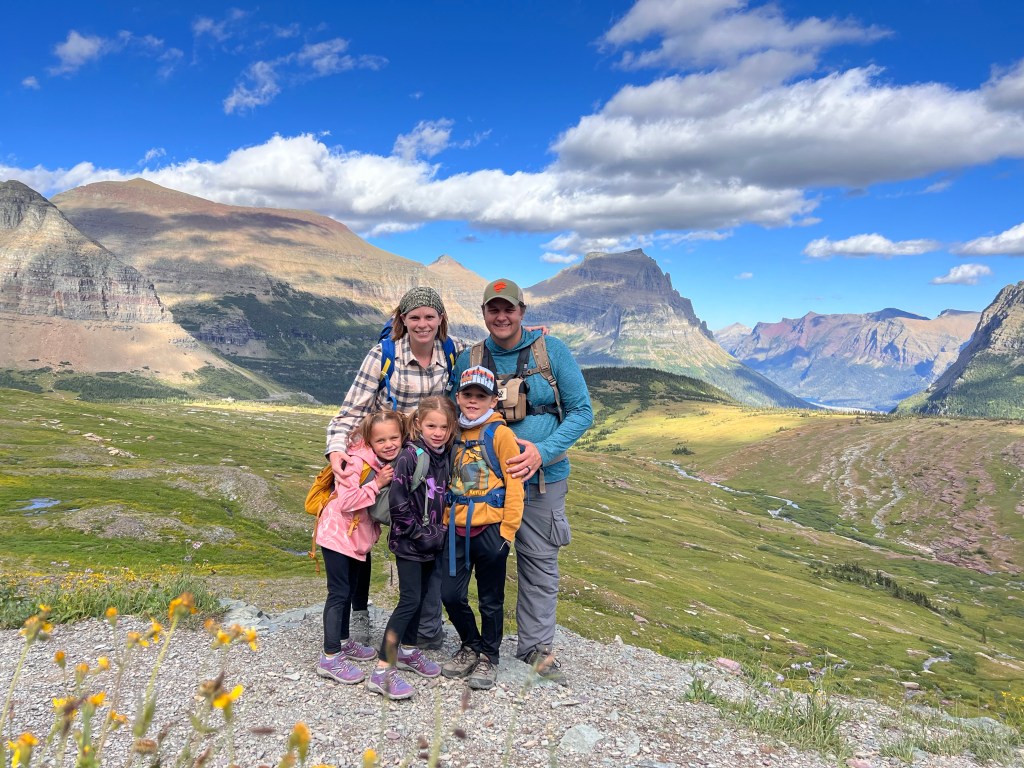
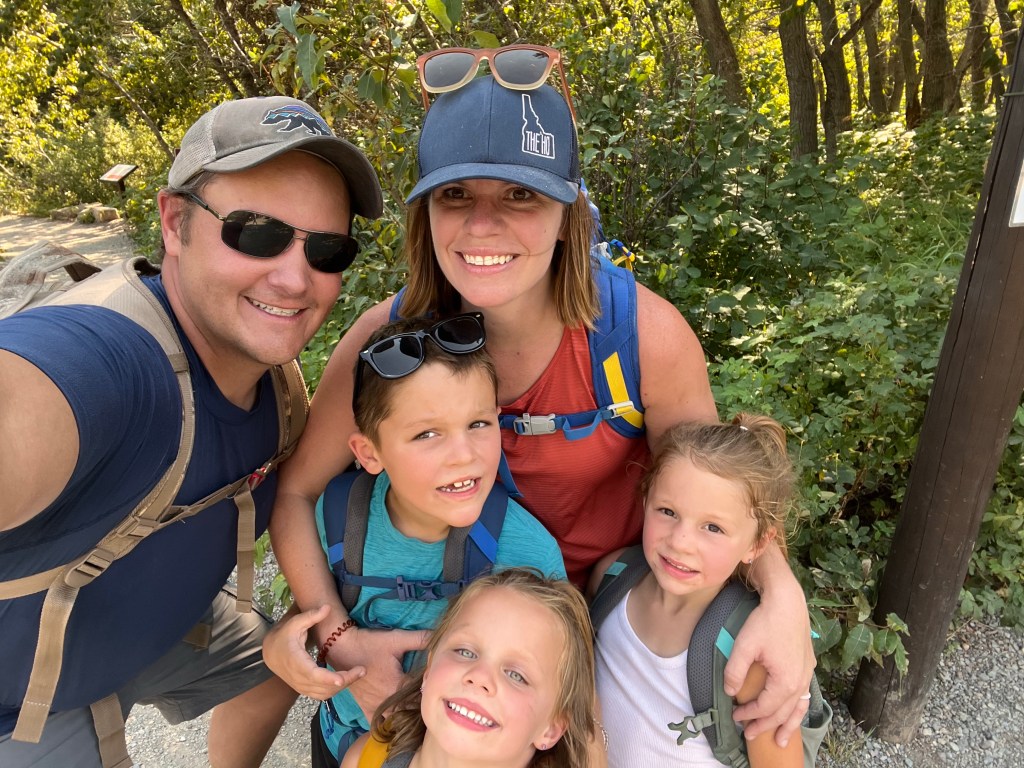
While Going-to-the-Sun Road is a definite must-do when visiting Glacier, I truly believe that the best way to see the park is to get out and hike. There are so many points of interest in the park, and I don’t think there is one “bad hike.” Since Dan was able to take off for a week while we explored Glacier, we were blessed to be able to hike quite a few trails in the park. It was honestly hard for us to come up with our top five! While some of these hikes were a little more difficult than others, we still were able to complete each of them with our kids. At the time of this trip, our kids were 8, 5, and 5.
Before listing our top hikes, I want to emphasize some important tips. Please consider these tips as you hike into Glacier’s backcountry, even if it’s a shorter hike.
Carry Bear Spray: Glacier is prime bear country. We were blessed to be able to safely view bears from our vehicle on eight different occasions throughout the week. We spotted seven black bears and one grizzly bear. With Glacier having such a short season with snowy winters, bears and humans are occupying the mountainsides at the same time of year. When hiking with the kids, Dan and I both carry bear spray on our hip. Don’t keep it in your backpack – you want it easily accessible. We keep the kids between us, with one of us in the front and one of us in the back. Bear spray can be purchased in the park or even at WalMarts and Costcos (cheapest!) if you are close to a town with one of those stores. If you are flying in, either buy it at one of these stores or you can rent it through Glacier Outfitters. Rentals can be reserved online and picked up in either Apgar Village or even the Glacier Airport.
Stay on the Trail: Glacier has delicate ecosystems, especially at elevation. If you are hiking in the alpine zones, the vegetation is especially fragile due to the short growing season. We saw a group disregard the signs on one trail asking you to stay on the designated path. For the first time, karma was on our side and there was a ranger coming around the bend just as they starting hiking onto some lingering snowpack.
Pack it Out: The saying you often hear is “a fed bear is a dead bear.” Once a bear gets a taste of human food, they’ll come looking for it. Make sure you pack out all of your trash.
Expect Crowds: Of all the national parks we have visited, I have never encountered crowds quite as bad as Glacier. This is especially true at trailheads. Make sure you are flexible with your plans for the day. If there is no parking at a trailhead, consider riding the shuttle for free. Don’t expect to be taking in any natural wonders on your own…. be prepared for lots of people… even on the long hikes!
Pack for ALL the Weather: Packing layers is essential in Glacier. You might do a hike down near one of the lakes that is warm with a slight breeze and then later in the day it’ll be cold and windy. We experienced so many different temperatures, wind, sun, snow, smoke, rain; all in the week we were there. You should also pack sunscreen, as many of the hikes at elevation are exposed with full sun.
I have lots of other tips and tricks for hiking with kids. From wearing appropriate footwear, to bringing all the snacks, and giving them ownership of the hike… there are things that we’ve found that have worked to encourage our kids to go the extra mile, literally. Kids are capable of extraordinary things and as I tell mine all the time, “you can do anything you put your mind to.” Our kids have impressed the heck out of me with their mileage and elevation gains… this past trip doing some of their longest distances. It means the world to be able to experience some of these new places with the kids. Their wonder and their sense of accomplishment makes every hike worth it.
Trailhead Location: Going-to-the-Sun Road near Lake McDonald Lodge
Avalanche Lake is a highly trafficked trail and parking can sometimes be difficult. The trailhead sits right along the Trail of the Cedars, which is another great add-on hike of less than a mile. The Trail of the Cedars winds along a boardwalk through an old growth cedar forest. It is a great option for younger children who want to walk, or also as an add-on to the Avalanche Lake hike, which is what we did when we went on this trail.
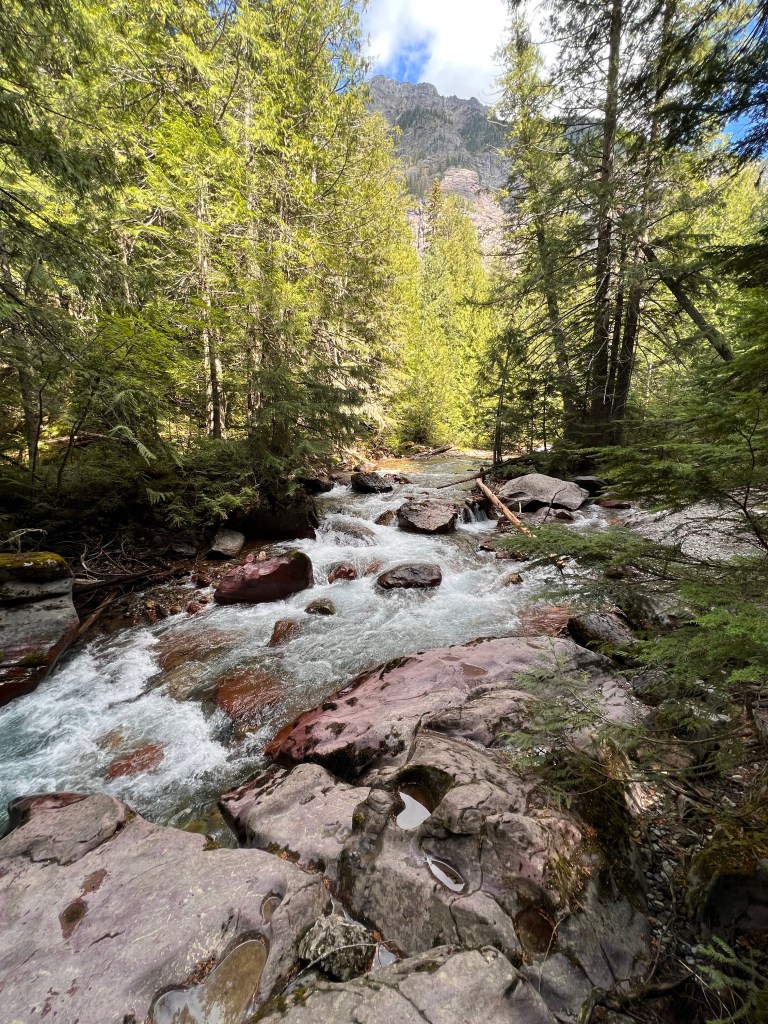
One of the first natural wonders you’ll encounter on the Avalanche Lake Trail is a narrow gorge of red rock, carved out by Avalanche Creek. It is a happy surprise on the trail and there are several spots where you can look over the gorge. After encountering the cascading waterfalls, you will veer away from the creek and complete the remainder of the hike through a pine forest. You’ll gain some elevation, but the path is well-cleared. You will come to the first views of the lake after about 2.5 miles. There are some benches to eat some snacks, and plenty of shoreline to take in the views of the lake (most likely with quite a few of your newest hiking friends). The trail does continue around a portion of the lake, but it does not encircle the lake. Completely up to you if you want to continue on the hike for another quarter mile.
There is a pit toilet located just before you reach the lake. To get back to the trailhead, turn around and go back on the same trail.
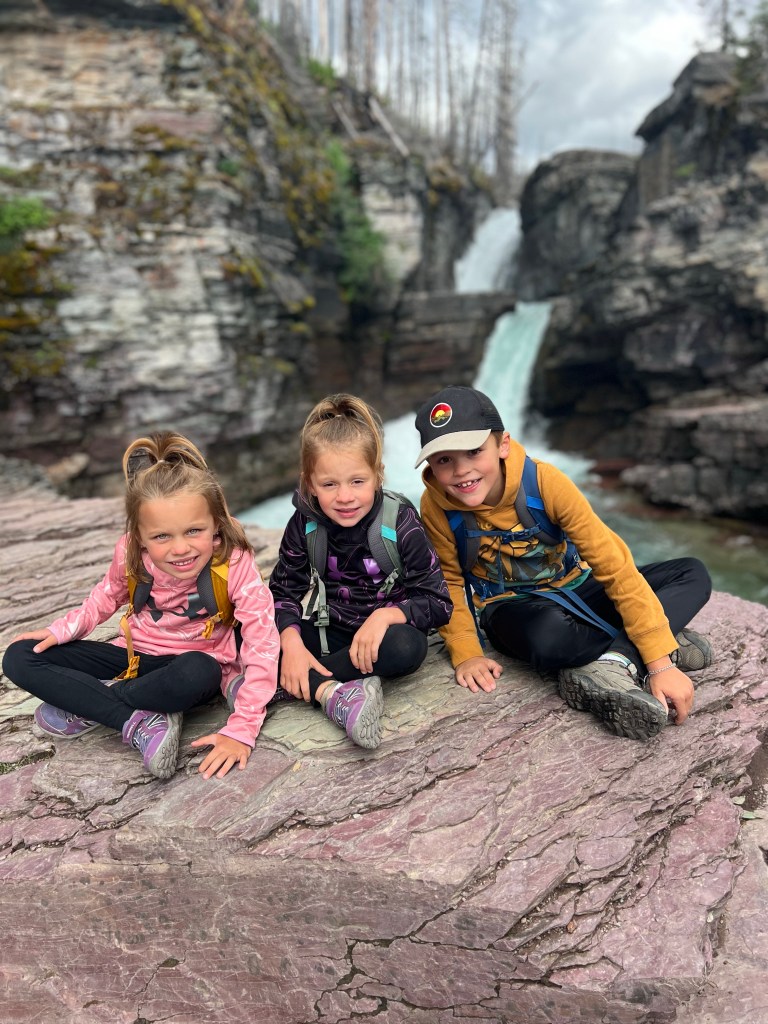
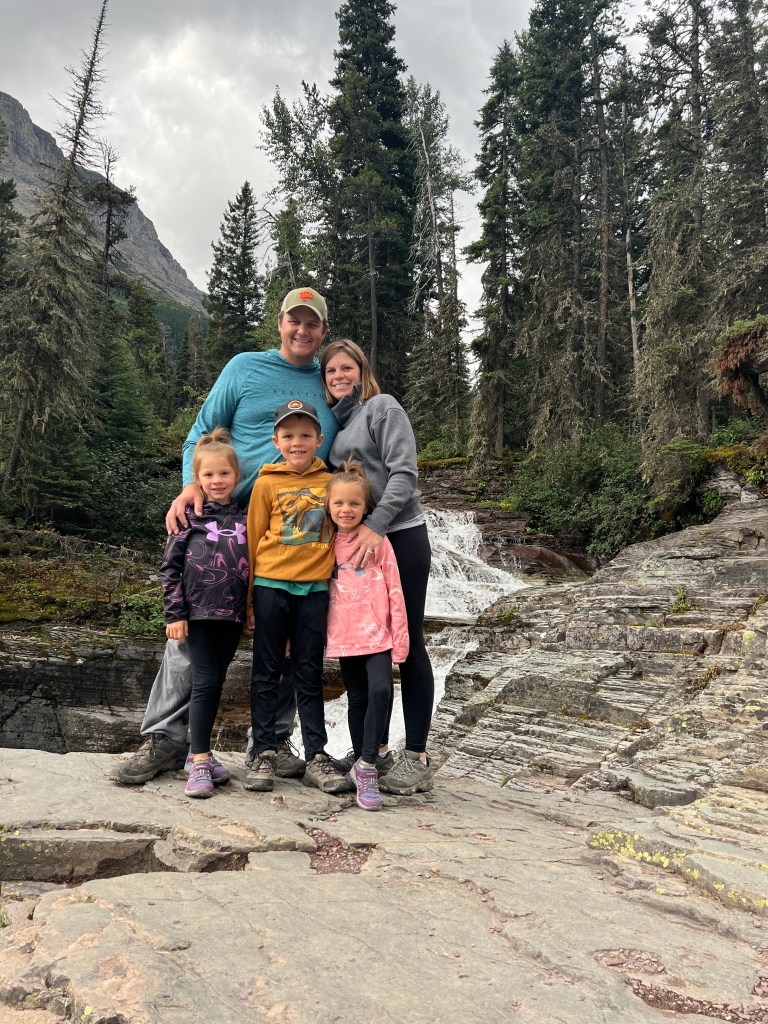
Kids in an old tree along the Trail of the Cedars.Our family at Avalanche Lake. Pictures do the water color no justice.Water was incredibly shallow near the shoreline.Avalanche Creek gorge.Avalanche Creek.
Trailhead Location: Going-to-the-Sun Road near St Mary Lake in East Glacier
I have to be honest, this trail holds a very special place in our lives. For those that don’t know, in 2011 Dan took me on a surprise trip to Glacier. It was on this hike to Virginia Falls that Dan got down on one knee and asked me to marry him. And the rest, they say, is history.
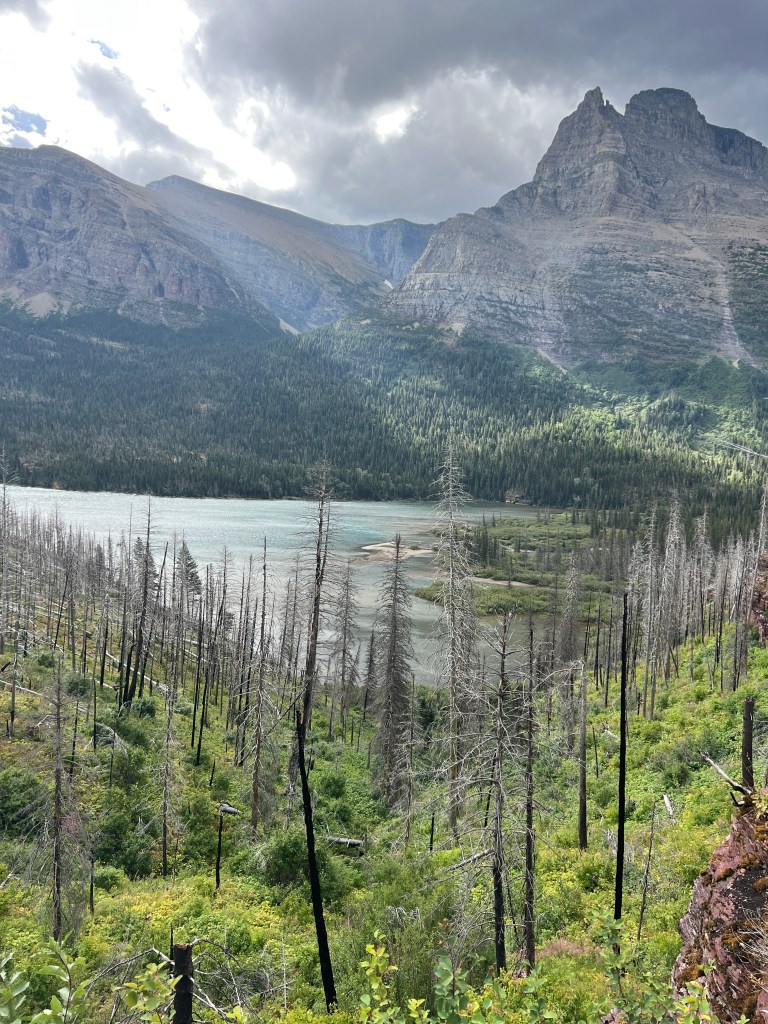
Because of our special moment, we knew we wanted to take the kids back to this hike in particular. Some things have changed since our last visit eleven years ago! First, this hike is another popular hike in the park, meaning if you see a parking spot, grab it. If you are unable to gnab a parking spot, the shuttle does make a stop at the trailhead, which is accessed right off the road. Secondly, the area was engulfed in a wildfire back in 2015. As a result, the first mile and a half of the trail is walking through some burned out trees. The upside, however, is that you get beautiful views of St Mary Lake as you hike.
When we hiked this trail, it was incredibly windy. As I noted above, pack layers for in the park. The wind was whipping down through the valley and was gusting quite heavily. We still had a beautiful hike though. The first waterfall you will encounter is St Mary Falls, a triple tiered waterfall that drops 35 feet. What is most spectacular about St Mary Falls is the color of the water. Being glacial fed, the minerals from the glaciers and rocks are deposited into the water, giving it the most magnificient teal color.
After viewing St Mary Falls, continue on to Virginia Falls. You will first veer closer to Virginia Creek, and some cascading waterfalls as the creek loses elevation. If you are interested, it was near these cascading falls that Dan dropped to one knee. You will continue to climb a little bit of elevation, before viewing the second waterfall of the hike, Virginia Falls. In all honesty, being able to view Virginia Falls up close takes my breath away. You will be able to stand right at the base of the falls, and see the water cascading down the main fall of nearly fifty feet. The kids loved feeling the spray on their faces and we spent some time at the falls. There is a pit toilet located just a little way down from the base of the falls. To get back to the car, turn around and take the same trail back to the trailhead.
Views of St Mary Lake at the beginning of the hike due to an older forest fire.Kids at St Mary Falls.The upper portion of St Mary Falls.Revisiting the spot where Dan popped the question.Kids at Virginia Falls.Spying a moose on the hike back to the car.
Trailhead Location: Going-to-the-Sun Road, behind the Logan Pass Visitor Center
First of all, good luck getting a parking spot at Logan Pass. Nearly every time that we drove past the parking lot, it was overflowing and full. We did get lucky twice! Once when it was overcast, windy, and freezing cold… and late in the afternoon. The other time it was also overcast, freezing, and late in the afternoon. Logan Pass is the highest point on the Going-to-the-Sun Road and it gives you sweeping alpine views. We nabbed a spot late one afternoon and decided to hike this trail right away (even though we had already hiked six miles earlier in the day). If you are unable to find a parking spot (or don’t even want to try), Glacier does have a shuttle system where you can park lower down the mountain and ride the shuttle up to Logan Pass.
This is also a good time to mention that you should always travel with layers while in the park, especially if you plan on hiking. The hike we completed earlier in the day was warmer and the kids were walking barefoot in the water. Later on in the day, when we were able to hike Hidden Lake, the temperature had dropped significantly and the wind had picked up. It was so cold and windy, the kids were using buffs from their backpacks to wrap around their faces to keep them warm.
I also want to mention that Logan Pass has a very short open season. In 2022, it had one of the latest openings (mid-July) due to late season snowfall. And that was just the road opening. Trails will most likely be closed even longer. This happened to us when we visited in 2011, we weren’t able to hike Hidden Lake because it was still snowcovered. Usually, snowfall arrives by mid-to-late September, and the pass will close again.
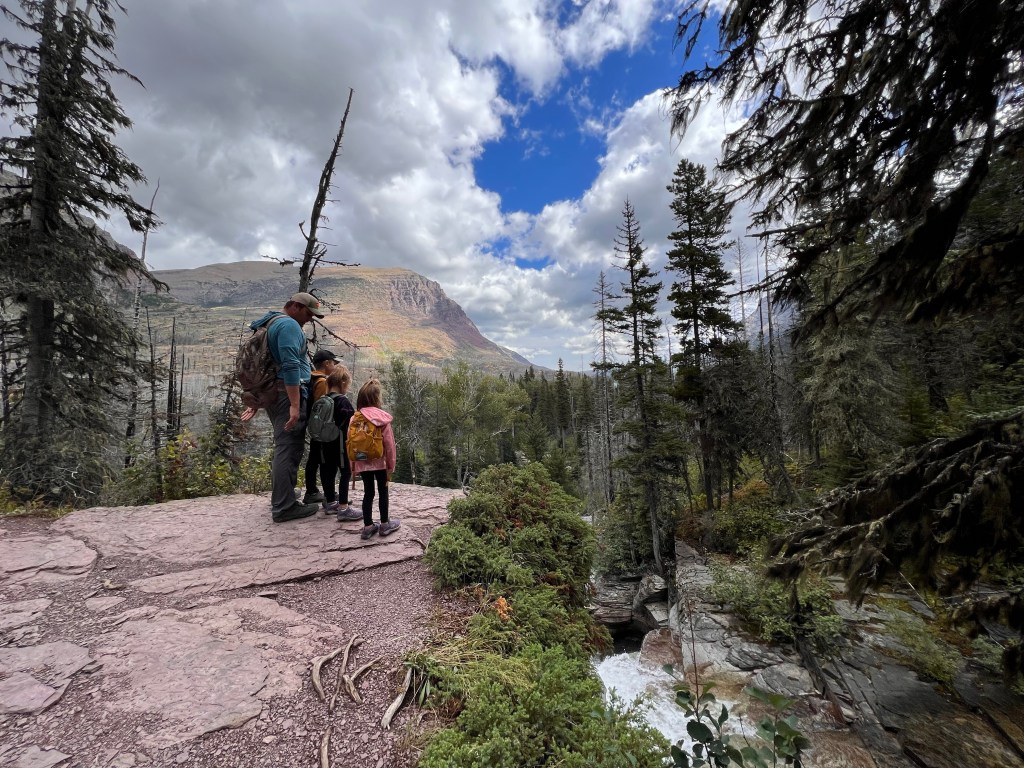
All of these warnings aside… tough to find parking, fitful weather, and short seasons… Hidden Lake is one of the best short day hikes we have ever been on. Sweeping mountain views, alpine meadows, high elevation lakes, and lots of wildlife sightings… this hike has it all, in just 3 short miles!
The trailhead can be picked up directly behind the visitor center. It is an easy trail for walking, the majority being on a boardwalk and then over packed dirt paths. You’ll encounter alpine waterfalls almost immediately… and quite a bit of elevation. Remember, hiking at elevation, the air is thinner and it can be harder to breathe. Hike slowly and marvel at your surroundings!
This trail is an excellent place to view lots of Glacier’s wildlife. We saw ground squirrels, marmots, bighorn sheep, and mountain goats on the hike. Grizzlies are also known to be spotted in the area. As a matter of fact, you can typically continue this hike all the way down to the lake, but at the time we visited, the trail was closed beyond the overlook due to a mama grizzly and her cubs frequenting the lake area. We scanned for them with our binoculars, but weren’t able to spot them.
To return to your car, you take the same trail back to the parking lot. I also want to note that you should not leave the trail during this hike. It is against the rules to disturb the natural environment while in the alpine meadows. They have a short growing season, and you will get in trouble if you are caught straying off the trail!
The hike out to the Hidden Lake overlook.Sweeping alpine views all around!Hiking to Hidden Lake. It was cold and windy!Hidden Lake in the distance.Our family with the glacial peaks in the background.
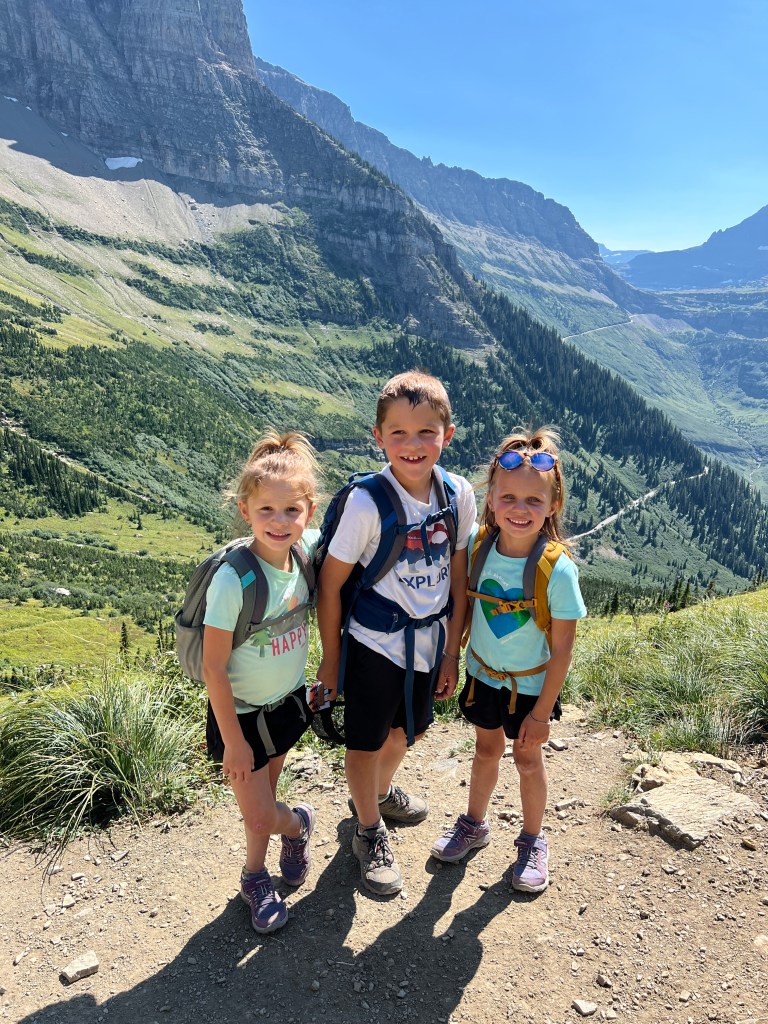
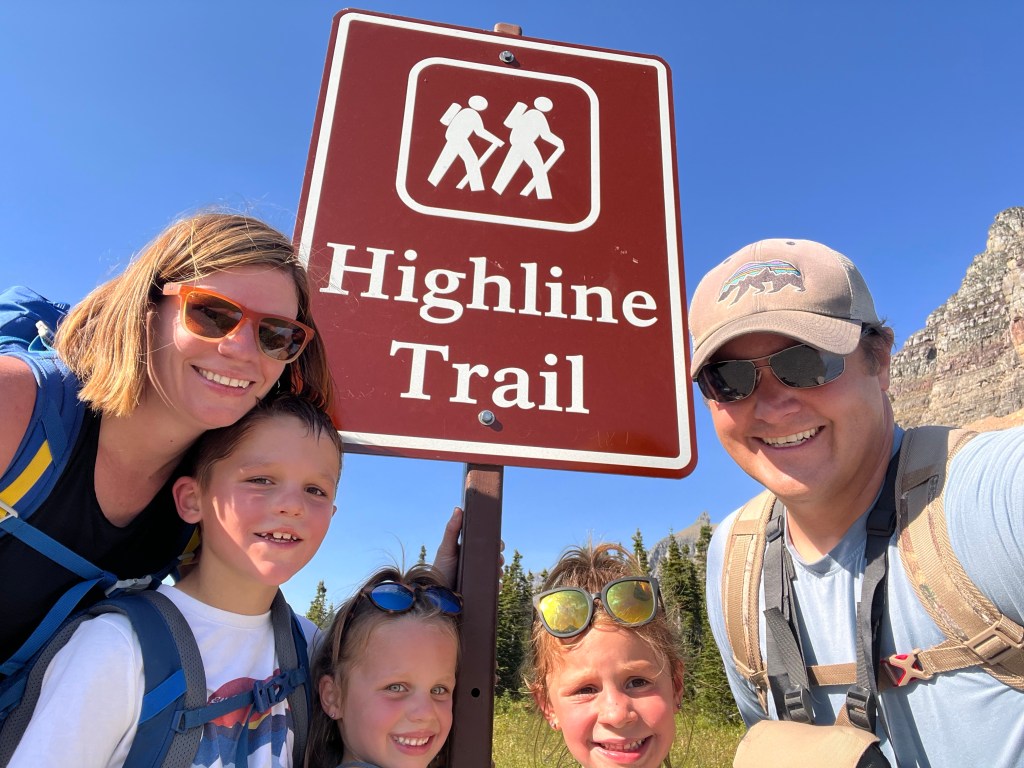
#2: Highline Trail (to Haystack Butte)
Mileage: 8.2 miles out and back (but you can longer if you want to do a point to point hike of Highline)
Trailhead Location: Going-to-the-Sun Road, across the road from the Logan Pass Visitor Center
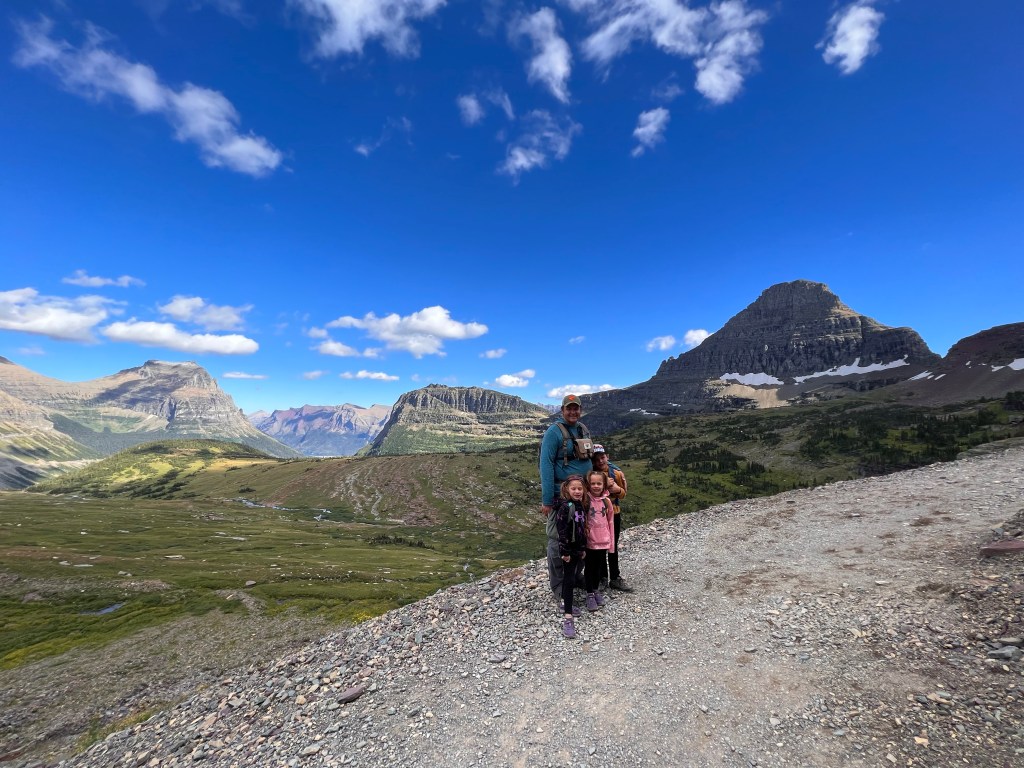
I am going to start off with a slice of reality – hiking any portion of Highline Trail is generally the one hike that many people come to the park to do. Highline is unlike so many hikes, and it gives hikers a sense of daring adventure, with unparalleled views of the park. Because of its popularity, the parking lot at Logan Pass, where you can access the trailhead, is typically full by 7:30 in the morning. Parking lots will continue to fill up down the mountain as time passes. Your best bet to access the trail is to take the Glacier shuttle; parking further down Going-to-the-Sun Road and riding the shuttle up to the parking lot. The other option, of course, is to wake up before sunrise and get in the park!
When we decided to do a portion of the Highline Trail, we made two mistakes. First off, we did not have an endpoint in mind. We weren’t sure how far the kids could hike (their longest hike up to that point was Mt Washburn in Yellowstone at 6 miles). The second mistake is that we attemped to get a spot at Logan Pass instead of just riding the shuttle. Driving all the way up to Logan Pass, then having to turn around and find a shuttle spot, and then wait a half hour for a shuttle took over an hour’s time, meaning our hike started later than we wanted.
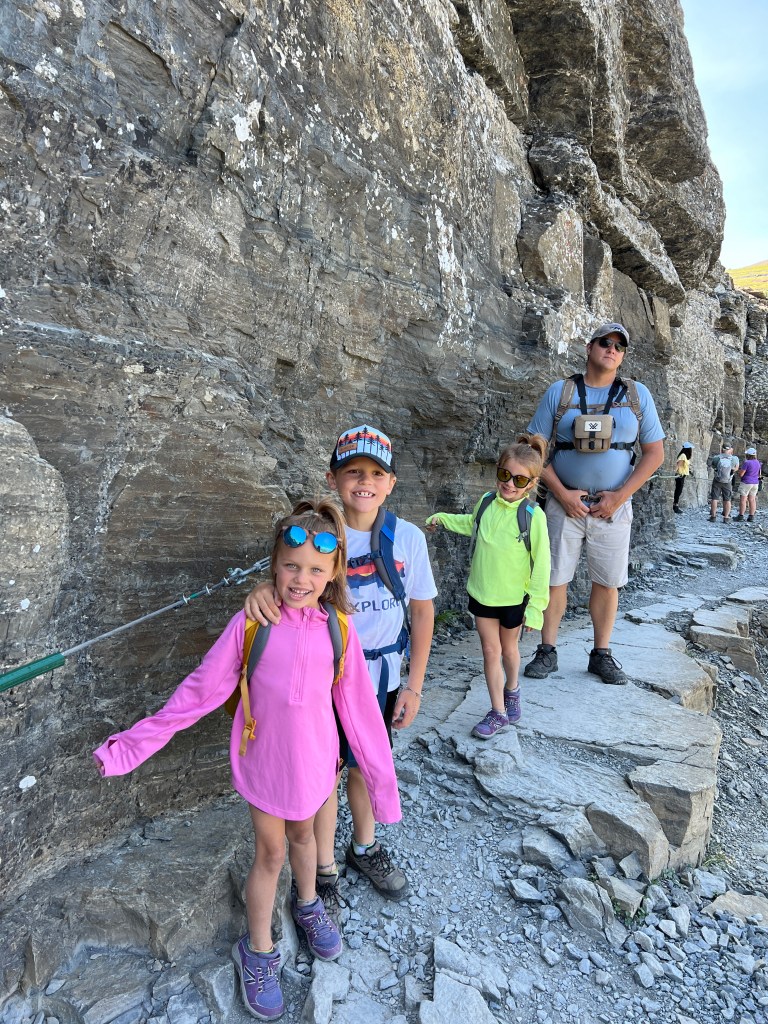
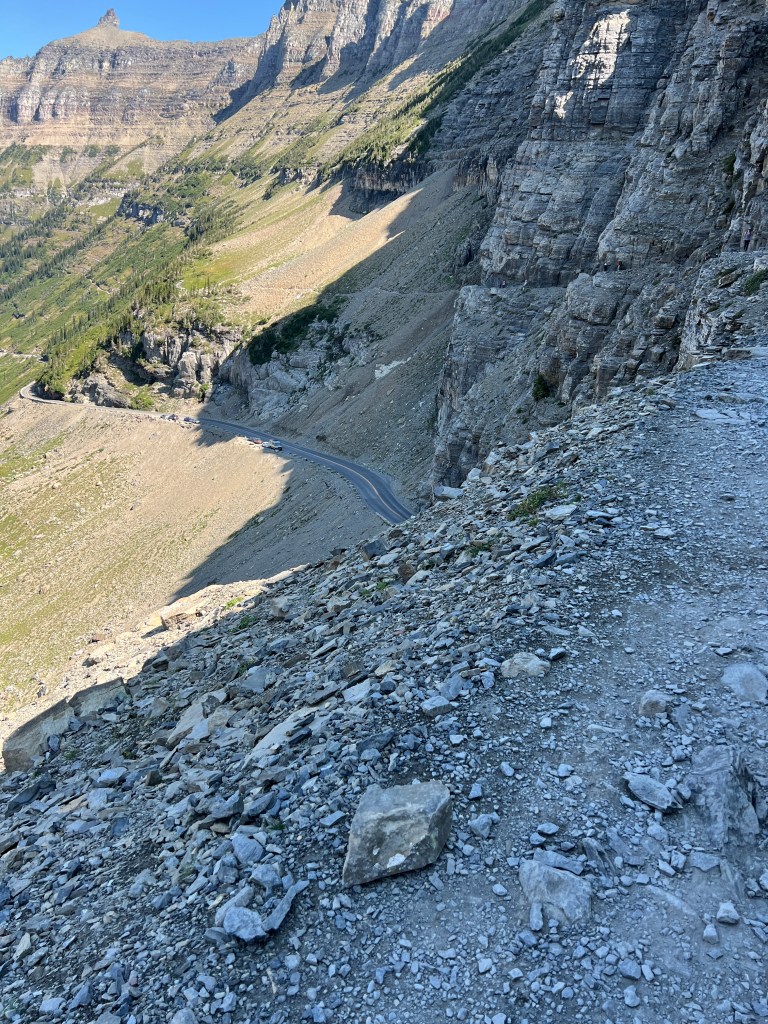
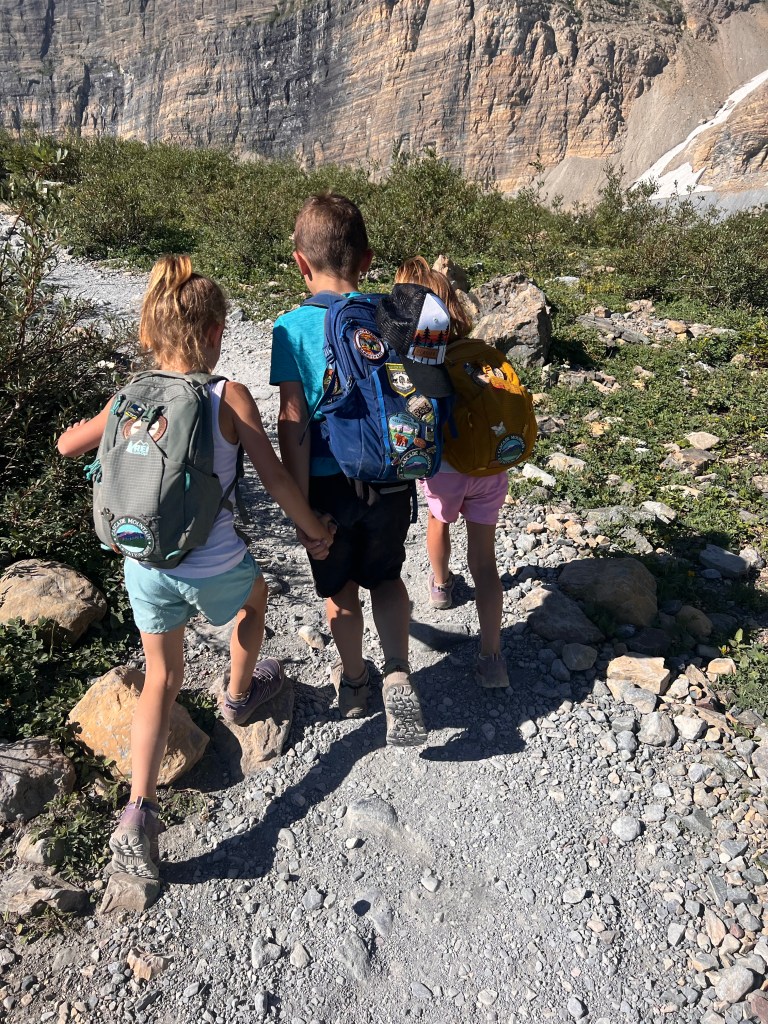
We finally got to the trailhead at Logan Pass around noon. The beginning of the trail is the most highly sought after part of the hike, and the portion that the majority of people who hike Highline Trail complete. The first half mile of the trail snakes its way along a fairly narrow cliff edge, directly above Going-to-the-Sun Road. There are sheer drops and sweeping views of the valley below. Cars pass by below, as you wind along the ridgeline of the Continental Divide. For this first portion of the hike, there are cables drilled into the rock face for you to hold on to. After reading about this portion of the hike, we honestly debated on whether to hike it with three young kids. In the end, I am so glad we did. We talked to the kids before starting out and talked about the importance of holding on to the cable line and watching your step. While the trail was narrow, there was still room for people to pass you on the trail without a big risk of being too close to the edge. I will also state that the other hikers were very considerate of our children, and people coming the opposite direction all moved off the cable to let our children pass, so our kids never took their hands off the handholds.
After getting past this part of the hike, the amount of people on the trail honestly filters out. I think a lot of people turn around after hiking a short portion of the trail and hike back to their car. This is something that you could do if you aren’t interested in continuing on the trail. For roughly the first 3.5 miles or so, the trail follows the same ridgeline as Going-to-the-Sun Road and you can see the cars winding up the mountainside far below you. There were some portions of the hike that are very narrow and have steep cliffsides (this time with no cable handhold). To tackle this, we each had the girls secure their hiking backpacks around their waists and chests tightly, and kept our hands clasped around their backpack straps. I would be lying, however, if I didn’t say it made me wary, especially with Levi walking on his own. My own fear of heights kicked in a few times.
After veering away from Going-to-the-Sun Road, you climb a few switchbacks up to Haystack Butte. Here, you get views of a new valley, and ground squirrels scamper about. We ate a lunch up here. I should note, this entire hike is exposed in the sun… there is not much shade. Keep this in mind as you hike. When finished lunch, we turned around and hiked the 4.1 miles back to Logan Pass. On the way back we saw two large bighorn sheep rams and a mule deer doe.
I stated at the beginning of this section that if we had made two mistakes on the day we hiked Highline. We had no idea at the beginning of the day that the kids would be able to muscle through 8.2 miles with quite a bit of elevation gain. If we had known they could’ve done the mileage, we would’ve caught an earlier shuttle and hiked the entire Highline Trail down to the Loop further down on Going-to-the-Sun Road. The length is roughly 11 miles, but after a certain point, the majority is downhill and there is no elevation gain. Along the way, you have the option to add on a Grinnell Glacier Overlook, and you can also access the Granite Peak Chalet along the trail (only accessible by hiking). This chalet is a place where you can get some snacks and water, and also apparently is a great place to view wildlife. This portion of the hike Dan and I have wanted to do since our first visit… but we didn’t think the kids could handle the length. It’ll definitely be a must on our next visit. Honestly, most of the early parking spot grabbers at Logan Pass do the entirety of this hike. This point to point hike picks up the Highline Trail at the top of Going-to-the-Sun Road at Logan Pass and meanders down in elevation to The Loop portion of Going-to-the-Sun Road on the west side of the park. After finishing at the Loop, people ride the shuttle back up to their car at Logan Pass. You can find more information on the full hike at this AllTrails link.
You can pick the trail up at Logan Pass. The first section of the trail is on a sheer cliff side, but there’s a cable!Views of Going-to-the-Sun Road down below.My three hikers.Views from atop Haystack Butte.After trail selfie.
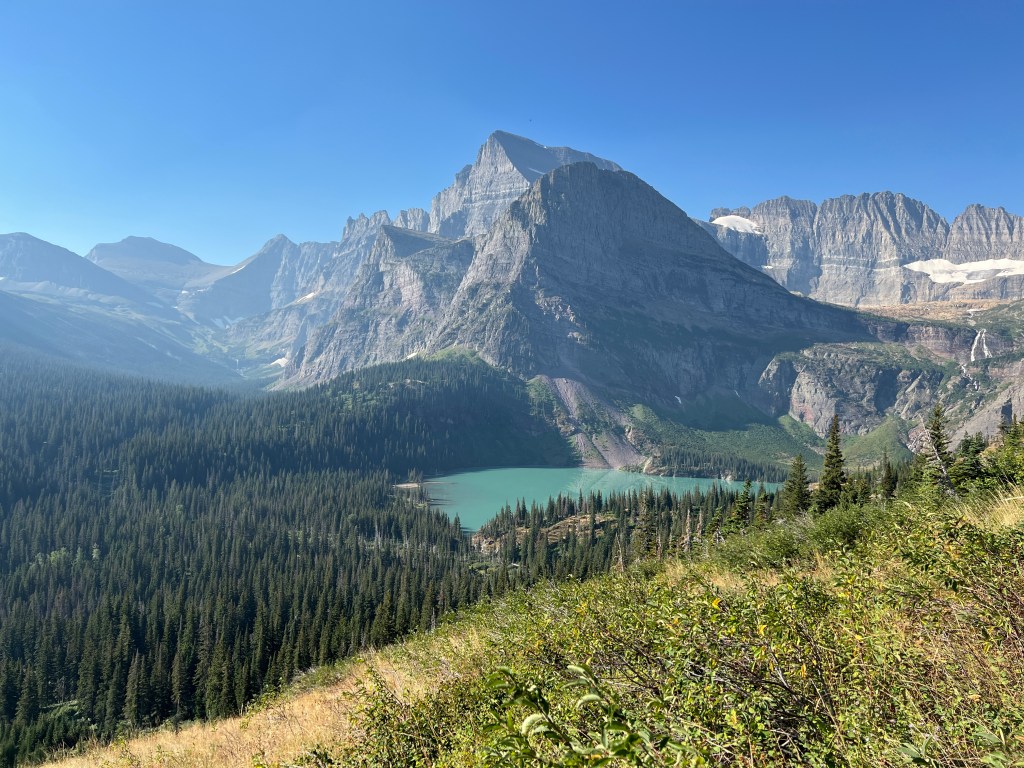
Trailhead Location: Grinnell Glacier Trailhead near Swiftcurrent Motor Lodge in Many Glacier
If you’re reading the mileage on this hike and are in disbelief that an eight year old and two five year olds completed it, you’re not the only one! I am still in disbelief that my three kids rocked this hike. This is a very popular trail, and your best bet to see a glacier up close; Dan and I have had it on our bucket list for years. We thought that we were going to be able to shorten the length of the hike with a boat ride, but we did not book early enough for the boat rides. Let’s just say, a lot of things have changed since we took that same boat ride in 2011.
Our kids really wanted to see a glacier up close. And after failing to secure boat ride tickets at an early enough date, we told them we weren’t going to be able to get up to the glacier. But, after they were able to rock the 8.2 miles to Haystack Butte earlier in the week, we thought they might be able to do it. They kept insisting on trying, so we decided to give it a go. We got up early one morning and got to the trailhead by 8:30AM in the Many Glacier part of the park. At the time, we had moved our camper to the eastern part of Glacier to make access easier for those parts of the park.
The beginning of this hike is relatively easy. It winds its way around two lakes in the Many Glacier area, first trailing around Swiftcurrent Lake and then winding its way around Lake Josephine. It is this portion of the overall mileage that you can cut off by taking a boat from the Many Glacier Lodge. This portion of the hike is sometimes closed due to bear activity. The hills around Lake Josephine are overgrown with berry bushes, a favorite of black bears!
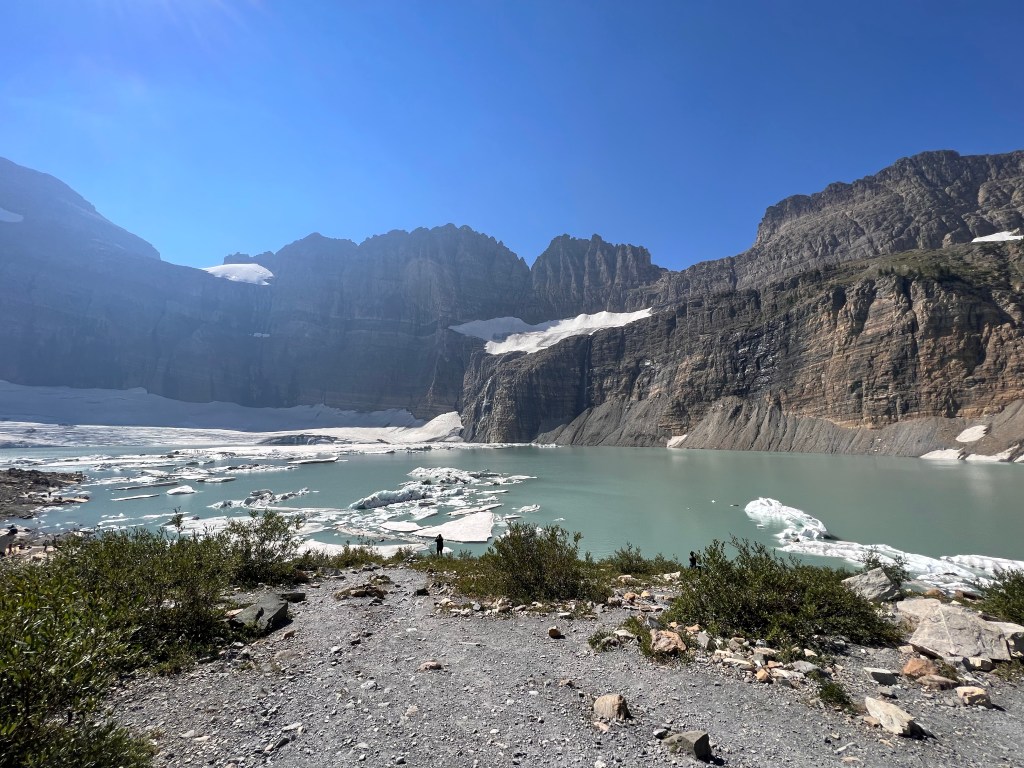
At the end of Lake Josephine is where the elevation climb begins. The elevation gain is no joke. If you travel to Glacier, I would not attempt this hike on the first day of your visit… give yourself some time to adjust to the elevation difference. You start hiking up. The beginning part of the climb you are surrounded by bushes, but the higher you hike, the vegetation clears out and you are given breathtaking views of the mountains. You will see down below the turquoise waters of Grinnell Lake gleaming in the sun. The color is unreal… the lake is fed by the glacier above. You’ll also hike along different colored rock striations, and in some parts you can see the fossilized sea floor from when this area of the continent was covered by a large sea. You’ll also cross over some alpine waterfalls… the number depending on the time of year you are hiking.
After a steady climb, you’ll find yourself close to the glacier. You won’t be able to see Grinnell yet… but it’s just up that hill. About a quarter mile from the trail summit, you can find a pit toilet. Beware, however, these pit toilets were nasty. I recommend packing along some hand sanitizer and maybe some toilet paper! The last quarter mile climb, in my opinion, is the hardest. It is a very steep elevation gain, but the reward is worth it. When you crest over the final hill, the views are amazing.
Grinnell Glacier is named after George Bird Grinnell, a conservationist who was instrumental in establishing Glacier as a national park in 1910. The glacier is one of just 25 remaining glaciers in the park. It used to cover 710 acres in the 1800s as one solid glacier, but climate warming has reduced the size of the glacier, so it now sits in two parts: the initial glacier itself and a shelf glacier that used to be attached. A lake now has formed at the base of the glacier, an area that used to be covered by ice. Visitors can no longer walk out on the glacier, for fear of further degradation. However, you can hike right out to the lake edge and see the glacier close by in the distance. The lake is cold, with icebergs floating in it.
We can attest that it is cold as the kids dipped their toes in the water. Be careful though… the rocks can be slippery! Levi actually slipped and fell in up to his neck in the icy water. It was a scary experience in the moment, but we were able to rescue him without drenching ourselves! We stripped him down to his undies, and wrapped him in some additional layers we had. There was a breeze blowing and it was chilly up at the top, but the sun warmed him quickly before we hiked back down. Just a note – take some additional layers on this hike!
We took a lunch and spent about an hour up at the top of the hike, especially knowing we had a long hike back. When you have rested, you go back the way you hiked up. I am not going to lie, by about mile ten, we were all tired. The sun was brutal on the way back down and there was no shade until you reached the lakeshores. By the end of the hike, Addy had a blister, Levi’s big toe was bothering him, Dan’s knees hurt, and my feet were killing me. But, we accomplished the whole thing… and the kids didn’t whine one bit.
I mentioned earlier on that there is a way to shorten this hike, and that is to ride a portion of the trail on a boat. The Glacier Park Boat Company operates several boat shuttles and tours on each of Glacier’s major lakes. You can reserve an early tour through the Glacier Park Boat Company which leaves from Many Glacier Lodge and will cross Swiftcurrent Lake, disembark passengers for a short quarter mile walk over to Lake Josephine, and then will take passengers to the other side of the second lake. This will cut off roughly three miles of the entire hike. If you book a trip, you can disembark at the end of the Lake Josephine, hike up to Grinnell, and then when you come back down, wait at the boat dock for a return trip. The boat company also offers guided hiking tours up to the glacier and/or a return trip only (which will allow you to just cut off the final 1.5 miles of the hike). Here are some things to note about booking a boat tour:
Boat tours need to be booked out early! When Dan and I visited in 2011, we walked up to the dock and booked the next boat. This is not the case anymore! We looked for tours more than a month before our trip, and there were none available.
Return trips can also book out, so reserve those too. I waited until a week prior to just book the return trip, and it was too late. They were completely sold out a week prior to our arrival (and I checked for every day that we were in the park).
If you manage to get a trip booked, make sure it is early in the day. The final boat disembarks from the top of Lake Josephine at 5:30, so if you are not back down the trail by that point, you’ll be walking your way back around the lake!
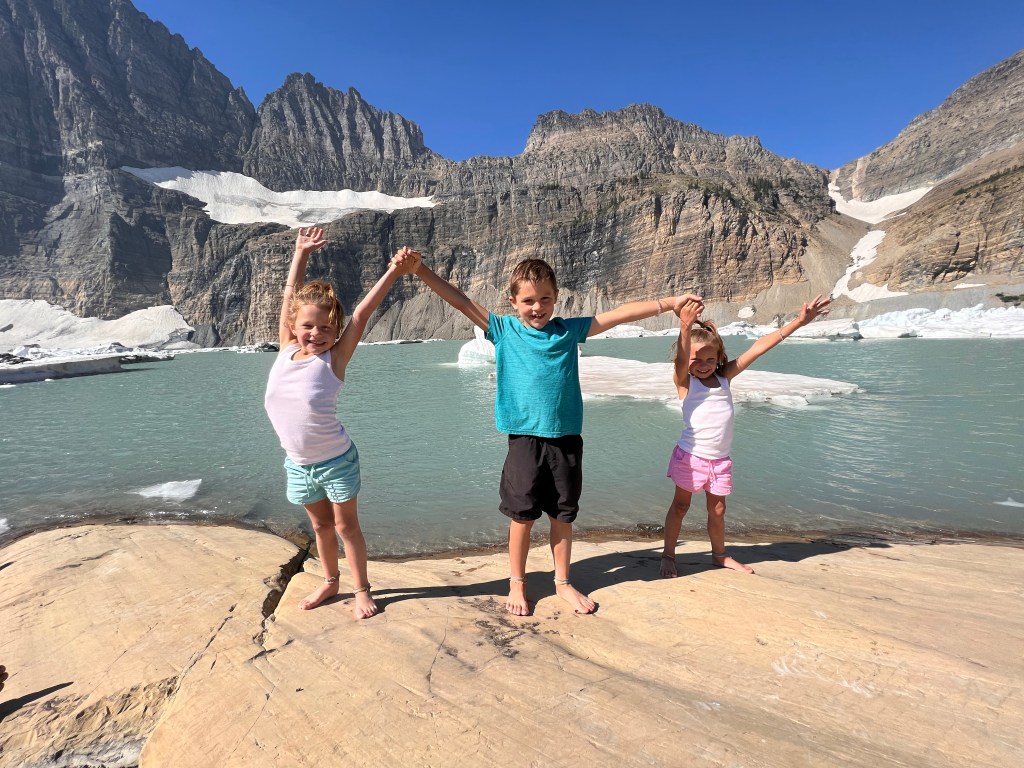
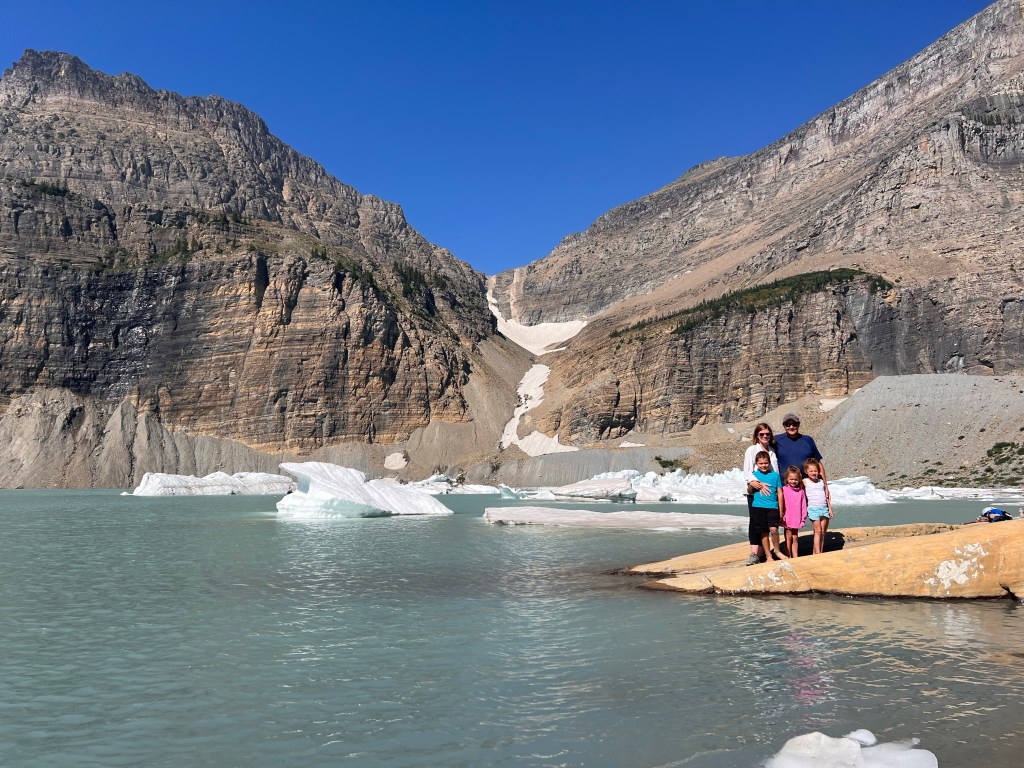
Swiftcurrent Lake.Lake Josephine.Grinnell Lake off in the distance.My three powering up the last quarter mile before the glacier overlook.Dipping his toes in the glacial melt.So proud of these three!Our family at the base of the glacier.Grinnell glacier in the background, with the melt ice lake in the foreground.Gorgeous mountain views.End of hike selfie.
“If Idaho Falls can’t help ya, I don’t know what would, but God, I hope you’re doing good.”
“Mountain Girl” by Shane Smith & the Saints
When Dan and I decided to make this dream a reality, we knew we were going to need some time getting our boots wet and testing the proverbial waters on what we would need for full time living. And we already had plans on the books to spend the month of July back home in Maryland and Pennsylvania. After we finished clearing out our townhouse, the only logical thing we could do was to move our rig closer east. By moving the rig east to Idaho Falls, we were able to cut four hours off our drive… and when you are on a close country road trip, four hours can make a big difference!
We had never travelled to Idaho Falls during our time in Boise. My goodness, we honestly haven’t even scratched the surface on all this amazing state has to offer. And Idaho Falls did not disappoint.
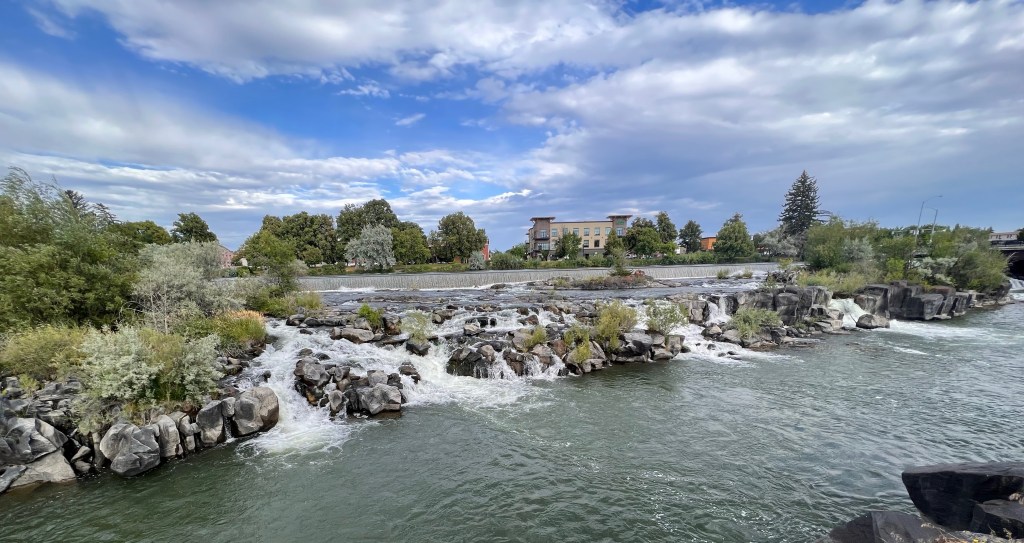
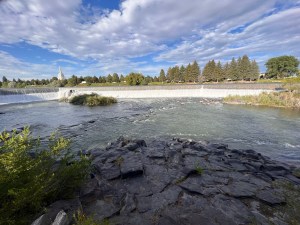
Situated on the Snake River, the town was was actually known as Eagle Rock until 1891. That’s when it was renamed to Idaho Falls after a series of rocky rapids in the middle of the Snake River. And while those falls have changed a lot since the late 1800s, they are still an integral part of the town. A dam was built in 1912 along the falls to help power the growing town, but that was destroyed in 1976 after the Teton Dam disaster. What was rebuilt is, in my opinion, a marvel of modern technology. There is still a dam in the center of town, but it was integrated beautifully into the flow of the river. It is the least obtrusive dam I have ever laid my eyes on! It still, to this day, is the center of the city.
As mentioned before, Idaho Falls was a place for us to figure out how live in a 400 square foot space. Most of our time there was spent transforming a toy hauler garage into a kids’ bedroom/classroom/playroom, organizing the under storage of our rig’s “basement,” and installing various items we had bought to help make full time travel a bit easier.
That being said, we did get to do some exploring! I’m still trying to figure out how best to organize this blog… whether to write our travels in a story or to write some blog posts on the best things to do? Maybe a little of both? Give me some ideas if you have preferences one way or the other. But for now, here are our top things to do in Idaho Falls, if you ever find yourself in the area!
Top Five Things to Do in Idaho Falls
1: Walk or Ride the Greenbelt
We encountered the Greenbelt in Boise and fell in love. A walking (or riding) path, spanning both sides of the Boise river, that went on for miles. We absolutely loved being able to take the kids bike riding on the path, and the entire time we were walking along the river.
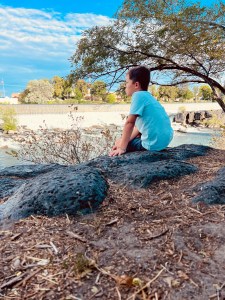
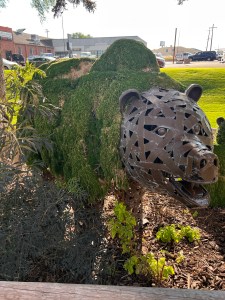
Imagine our surprise when we found out that Idaho Falls also had a Greenbelt, which also spanned both sides of the Snake River! The Greenbelt spans five miles on each side of the river. As you walk, not only do you get amazing views of the Snake River, and the aforementioned Idaho Falls dam, but you also get beautiful landscaping and plenty of picture vistas. My kids especially loved the moss animals that were art installations made out of metal and different moss types! You can find a map of the Greenbelt here.
2: Visit the Idaho Potato Museum
Okay, okay, so the Idaho Potato Museum isn’t really in Idaho Falls, but it is not that far and Idaho Falls serves as a great jumping point for so many great day trips. The Idaho Potato Museum is located just south of Idaho Falls in Blackfoot, Idaho. And what is a visit to the heart of potato country, without a stop at the museum honoring the famous crop! I can’t even begin to count how many people said to us, upon learning about our move to Idaho, “What are you moving there for? Potatoes?!” And I mean, Idaho loves their spuds… there is even a license plate out here devoted to a buttered baked potato.
Some interesting facts about potatoes that we learned while at the museum:
Idaho produces nearly 1/3 of all the potatoes in the United States. Of that, 50% of those potatoes come from the southeastern Idaho counties. You can thank the rich volcanic soils in the area for that.
There is actually a potato goddess – and while she is of Incan mythology, she still exists! Her name is Axomamma and she is the reason the Incans worshipped the potato.
The root is the only safe part of the potato plant to eat. The fruit, leaves, and stems are all toxic to humans.
The potato museum was very small, but cute. The kids loved looking at some of the farming equipment used to farm potatoes, enjoyed the entire kids section complete with several boxes of Mr. and Mrs. Potato Head parts to play with, and the gift shop.
To end our visit, we stopped at the attached cafe where you can get snacks of potatoes. We each had a loaded baked potato for lunch, and it was fantastic.
I know the kids learned a lot because on the way home, they were identifying potato plant fields left and right. We also found (after some desperate searching) a farm stand on the way home and bought some fresh from the field potatoes. We used these for our state tastings… there’ll be a blog on that later.
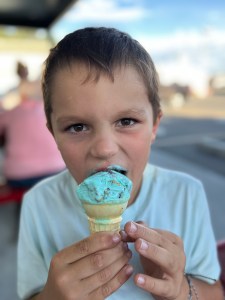
3: Stop at Reed’s Dairy for Ice Cream
I like ice cream, but we try not to indulge too much. But after a day out exploring, we passed this dairy farm and I just had to stop. I can’t even begin to tell you how amazing the ice cream (and milkshakes!) were! Kinsley got a treat of huckleberry milk – she was so excited that it was purple. Our favorite ice creams were the maple, the huckleberry, and the cookie dough! There are two locations in Idaho Falls, and we definitely recommend a stop! You can find their website here!
4: Take a Day Trip to Craters of the Moon National Monument
I am in the midst of writing a separate blog post all about Craters of the Moon, but I thought it was such a worthwhile visit, that it should be listed here. Located about two hours from Idaho Falls, you can find Craters of the Moon National Monument. It is a surreal landscape shaped by volcanic eruptions from thousands of years ago. It is also one of the best places to observe the changes that eruptions can make the surrounding ecosystem.
You can spelunk in lava tube caves, hike up cinder cones, and the kids can do their junior ranger badgework! I don’t want to go in any more detail than that, but Craters of the Moon is well worth the visit if you are in southeastern Idaho.
5: Visit the Idaho Falls Zoo
Dan got tickets to the zoo as a surprise for the kids who went through a time of a lot of stress and anxiety as we prepared for the move into a fulltime lifestyle. I was expecting the zoo at Idaho Falls to be something very small, but I was incredibly impressed upon arrival! I would rank this zoo as better than the Boise Zoo, but shhh, don’t tell anybody.
We had so much fun looking at all the animals. They had lions and lemurs and snow leopards! The best part is that it was incredibly evident how much time and effort the zoo staff put into caring for the animals and their enclosures. Everything was clean and well-decorated.
Perhaps our favorite part was the face painter. We decided to splurge and let the kids get their faces painted, something we almost never do. And the lady who worked there did not disappoint! Kinsley wanted a peacock, which turned out beautifully. Addy wanted a unicorn. But perhaps, my favorite, was Levi’s – who wanted a snow leopard. It wasn’t one she offered, but said she thought she could whip something up. It was amazing!
Idaho Falls Honorable Mentions
Costco: I mean, we stop whenever there is a Costco in town, but we were so surprised when this Costco had DIESEL fuel!
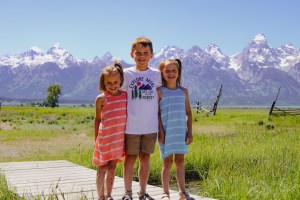
Grand Teton National Park: Grand Teton is only a two hour drive from Idaho Falls, and along the way, you are rewarded with some spectacular mountain views, especially when you drive over Teton Pass. We spent a day in Jackson Hole and then took a drive through the park. Why not a top five? Because it deserves a whole blog post devoted entirely to a multi-day trip!
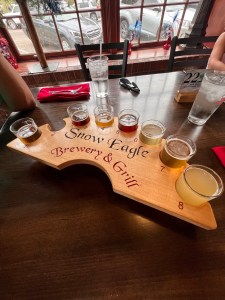
Snow Eagle Brewing and Grill: We took the kids out to eat on our anniversary here and the food was great. The beer flight was even better!
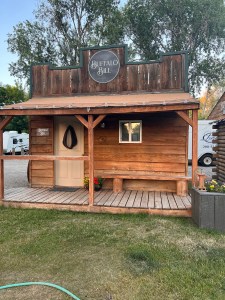
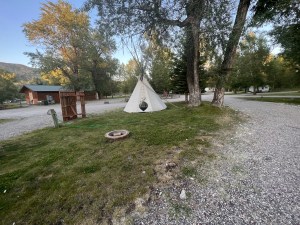
Mountain River Ranch Campground
I can’t finish a blog about Idaho Falls without singing the praises of the campground where we stayed. The Mountain River Ranch is located in Ririe, Idaho, about twenty minutes outside of Idaho Falls. It is nestled close to the Snake River and is the absolute perfect retreat. I would recommend it 10/10 to anyone looking to camp in the area.
It is under relatively new ownership and the new owners are doing an outstanding job of building the campground into the perfect getaway. There are beautiful campsites (water and electric only), a yurt, some cabins, and even an old camper you can rent out to stay in. The owners helped us as we were transitioning into the lifestyle, helped us find storage for the month we were home, and received our mail for us. I am so thankful to have been able to spend two and half weeks total here.
Follow along on our adventures: @our_pickett_fences